Chocolate Muffins
Chocolate muffins are not all created equal. I’m fussy about mine and make no apologies about it – there are a lot of calories in a muffin, so every one of them better be worth it! 😂 Here’s my laundry list of things a great chocolate muffin needs to have. It must:
Have a lovely crisp domeBe tender and moist insideTruly taste of chocolateBe quick and easy to make (as muffins should be!)Not include obscure or just plain weird ingredientsStay fresh for 3 daysBe still good for even another 2 days after that!
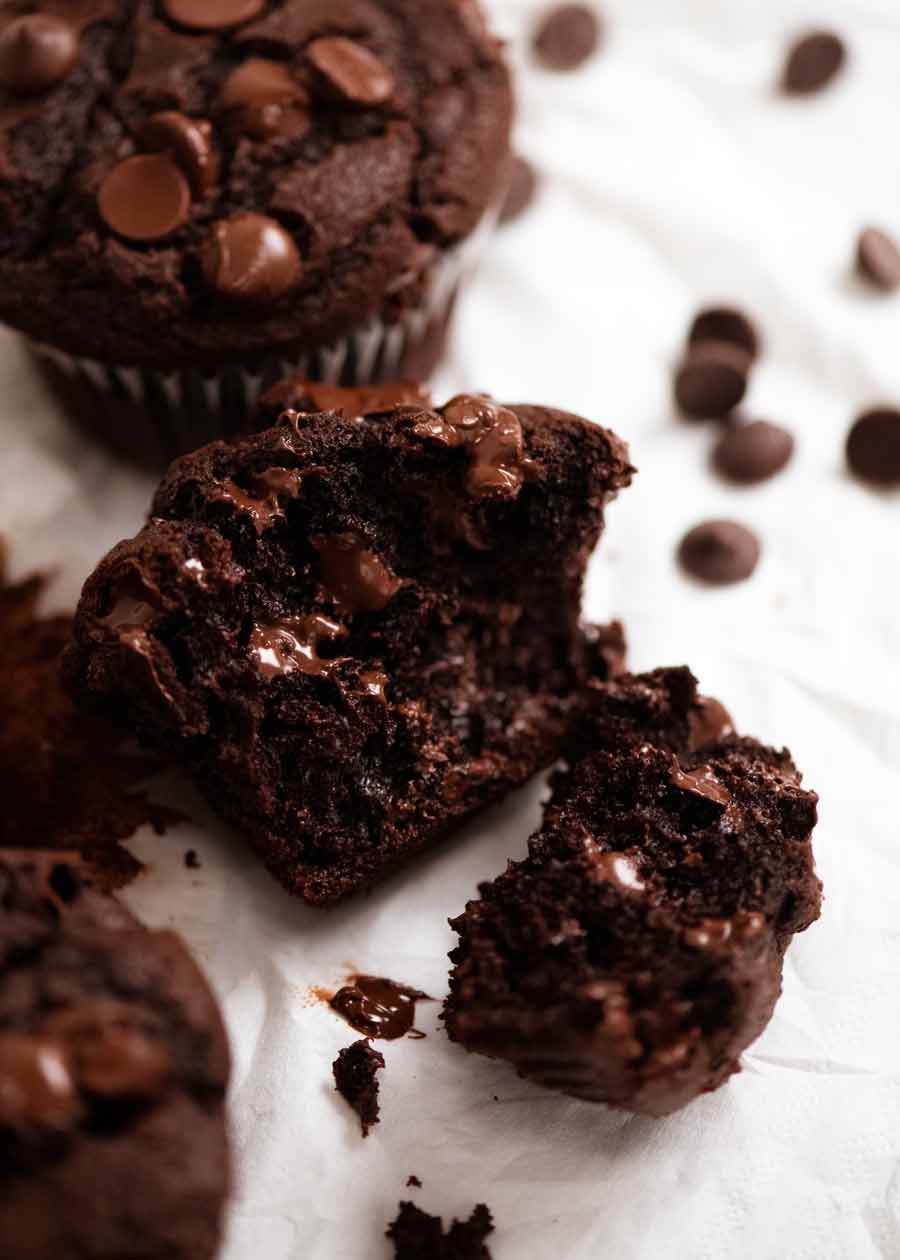
While this list of chocolate muffin characteristics might sound obvious to you, finding a recipe that ticks all these boxes is much harder than you think! In fact, in my whole cooking life, I have never come across a keeper. After (many!) years of attempts, I finally buckled down and committed myself to pursuing the ultimate chocolate muffin recipe, even if it killed me. In the end, it was a plethora of simple baking tricks that came together in creating what is my idea of the perfect chocolate muffin. I’m VERY happy with the end result and thrilled to share it! Chocolate muffins are notorious for being dry because of the cocoa powder. But not these!
The simple baking tricks for the BEST Chocolate Muffins ever!
Here’s the complete list of the simple tricks that make all the difference in this recipe. An explanation of the why behind each of these is in the ingredients section below.
Ingredients in Chocolate Muffins
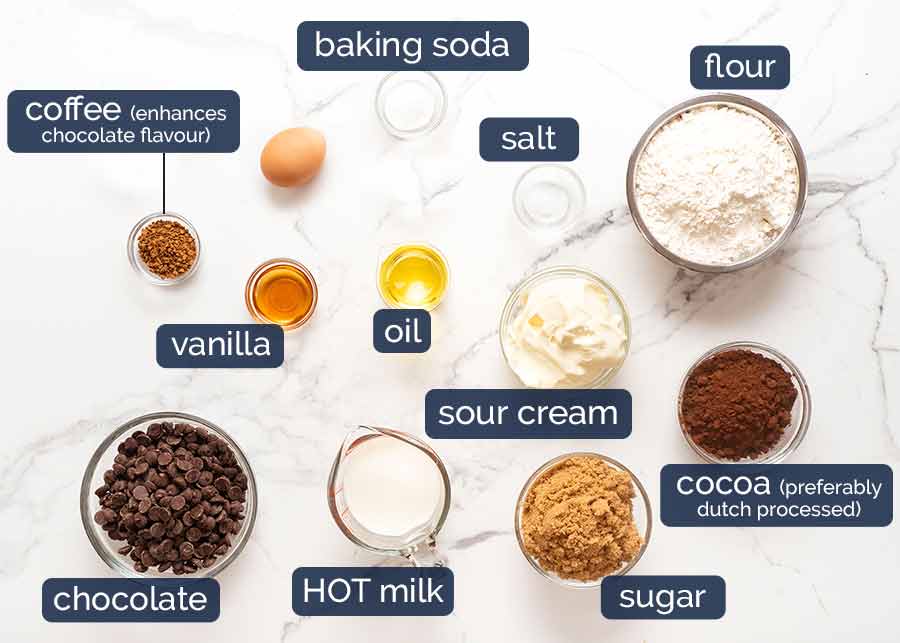
Here’s what you need to make these Chocolate Muffins. If you’re wondering – coffee? Did she make mistake? Read on below for why!!
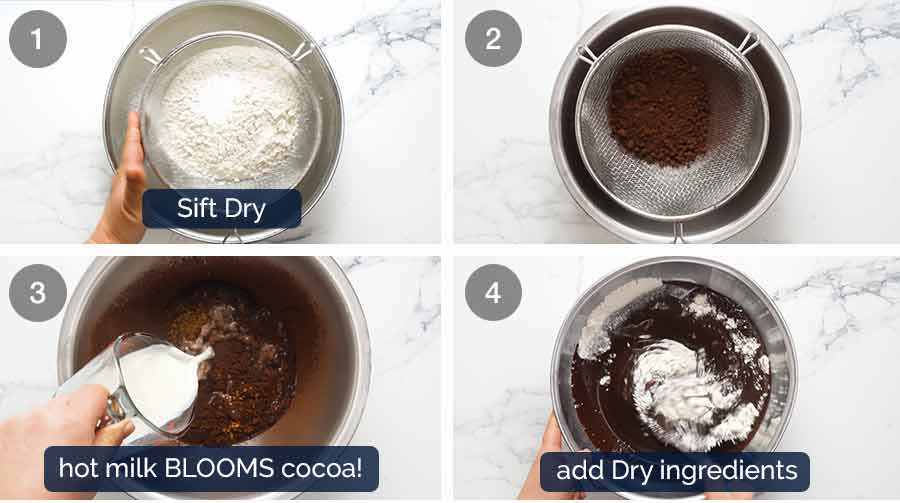
Instant coffee powder or granules – This is an age-old baking trick used to enhance chocolate flavours because chocolate and coffee share similar taste characteristics. You can taste the coffee in the raw batter but once baked, you cannot taste it. Any instant coffee powder or granules works fine here, no need to use an expensive one!Dutch process cocoa powder – This is a darker cocoa with a more intense chocolate flavour and colour than ordinary cocoa powder. It is slightly more expensive but yields a better result. Ordinary cocoa powder (unsweetened) will work just fine too. The colour of the muffins however will not be quite as deep and also it will taste slightly less chocolatey.HOT milk – A trick used in my Chocolate Cake and Fudge Cake, hot liquid (usually water) mixed with cocoa powder makes it bloom! This brings out the flavour and makes the muffins taste more chocolatey.Just 1 egg – Eggs are required to bind the crumb of cakes. But the problem is the whites tend to also dry baked goods out! So we use just 1 egg here. Compared to using 2 eggs, the extra moistness in the crumb is remarkable.Oil – This is the fat used in the chocolate muffins instead of the usual butter. While I love the flavour butter brings to baked goods, it actually has a drying effect on the crumb compared to oil. My side by side tests confirmed this also for this muffin recipe. So, oil it is!Brown sugar – While white sugar will make a slightly crisper dome, brown sugar retains moisture better which means the crumb is more moist (notice a trend we’re aiming for here??). It also adds a lovely caramel flavour to the crumb which compliments the chocolate flavour.As for making the dome crisp? I wasn’t willing to give that up! So I just blast the muffins at a slightly higher temperature for the first 5 minutes which helps give it a nice crispy dome. Now we get the best of both worlds!Baking soda (bi-carb) – This makes the muffins rise slightly better than using baking powder, while preserving the intense dark chocolate colour of the crumb. Baking powder does also work perfectly fine (use 4 teaspoons) but the muffins rise slightly less and give a slightly paler crumb colour.Vanilla – Just a touch, for flavour! Vanilla extract is fine to use here and is preferable to artificial vanilla flavouring. While real vanilla beans or vanilla bean paste has its place, I wouldn’t bother wasting them for this recipe.Sour cream – Another baking trick! This lets us introduce wetness in the batter but keeps the batter a thicker consistency than using, say, more milk. We need a thicker batter for chocolate muffins than for, say, cupcakes, in order to achieve that lovely dome.Yogurt can also be used in place of sour cream. Flour – Just plain / all-purpose flour. Self raising flour does work in place of using plain flour + baking soda as done here, but the muffins don’t rise quite as well. (I’d still use self raising flour if that’s all I had, though.)Chocolate chips – I use dark chocolate chips (called semi-sweet chips in the US) but any type of chocolate chips will work just fine here. Or chopped chocolate! Just be sure to use baking chocolate (from the baking aisle), not eating chocolate. The latter is not made for cooking in the oven and funky things happen when you do!Salt – Just a touch, it brings out the flavour in baked goods. Standard practice!
How to make Chocolate Muffins
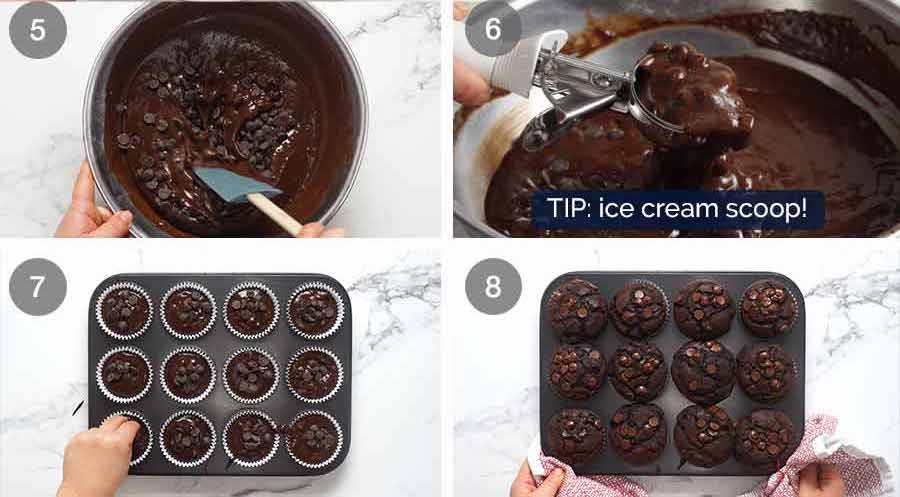
Mix Dry , mix Wet, mix Dry into Wet. Bake. Do you really need me to give you any more detail? 😂 Ordinary cocoa powder (unsweetened) will work just fine too. The colour of the muffins however will not be quite as deep and also it will taste slightly less chocolatey. As for making the dome crisp? I wasn’t willing to give that up! So I just blast the muffins at a slightly higher temperature for the first 5 minutes which helps give it a nice crispy dome. Now we get the best of both worlds! Yogurt can also be used in place of sour cream. The nice thing about these muffins is that you don’t need to be as careful about not over-mixing the batter (which causes a dry muffin) because this batter is not as thick as most muffin batters.
How long these chocolate muffins stay fresh
These Chocolate Muffins will stay very fresh for 3 days which is a rare feat in the muffin world! Most muffins begin to turn stale within hours of being made. By the next day they usually need to be warmed up to resurrect them. Then pour this mixture into the flour and whisk. Initially, after the flour is incorporated, the batter will look a bit split (ie. it’ll have fine oil streaks). Whisk until it’s smooth and glossy, but stop once it is. Don’t keep mixing on blindly! This will overwork the gluten in the flour and make your muffins tough rather than pillowy soft! That said, this batter is thinner than most muffins batters so it’s more failsafe in this regard. Note: This batter is THINNER than typical muffin batters. This is one reason why these cupcakes have a much more tender and moist crumb than the usual chocolate muffins. Do not overfill! Fill the muffin cases up to 0.5cm / 0.2″ from rim of paper liner. Don’t fill any higher as the muffin will overflow when baked since this batter is quite thin. (see Note 5) Bake at HIGH temp 5 minutes – Bake for 5 minutes at 210°C / 410°F (190°C fan). Starting off at a slightly higher temperature gives the muffins a kick start on the rise (required for this thinner batter) and gives the muffins a crunchier top. Bake at LOW temp 20 minutes – Turn oven DOWN to 190°C / 375°F (170°C fan) then bake further 20 minutes. So, 25 minutes in total. This is longer than most muffins and it’s because the batter is thinner (contains more liquid). Notes on oven temperature: I know these oven temperatures are a bit unusual compared to the typical 180°C/350°F. I tried baking these at all sorts of temperatures and I honestly think the temperatures I’ve landed on yield the best result. The muffins have a nice rise, crisp dome, moist crumb inside, without overcooked edges. How to tell the muffins are baked: Start checking the muffins at the 15 min mark on the low temp bake. When a toothpick inserted into the middle muffins comes out clean, they’re done. Don’t confuse melted chocolate with raw batter! Probe in multiple places if you are unsure. (PS. The slightest faint smear of batter on the toothpick is ok because residual heat will take care of any remaining rawness). Transfer to a cooling rack, and allow to cool for at least 15 minutes before attacking them! These muffins do start to lose freshness on Day 4 but a quick 10 second zap in the microwave is all you need to revive them to near fresh-baked-perfection. Sounds all too good to be true right?? Well, I think you’ll just have to make these and see for yourself! I’d love to hear how long you kept yours good for. Or, if they even made it beyond Day 1 before they disappeared entirely!! 😉 – Nagi x
Watch how to make it
Life of Dozer
He found a new bed.
